QuickBooks and Expensify App Integration
Reading Time:
Expensify offers receipt and mileage tracking, expense reporting, and company card reconciliation seamlessly integrated with QuickBooks.
With various functionalities such as ‘one-click’ receipt scanning, company card reconciliation, automatic approval workflows and automatic accounting syncs, keeping track of expenses is easier than ever.
If you think that Expensify could be perfect to sync up your invoices and expenses, you can find out much more about their software by visiting the Expensify website.
If this article has piqued your interest, we will assume you already have an Expensify account and are looking to sync it with your QuickBooks Accounting software. Then, our step-by-step guide will walk you through the process.
How to integrate Expensify with QuickBooks
Step 1
Log into your Expensify account.
Step 2
Make sure your pricing plan is a ‘Collector ‘Control’ Pricing plan.
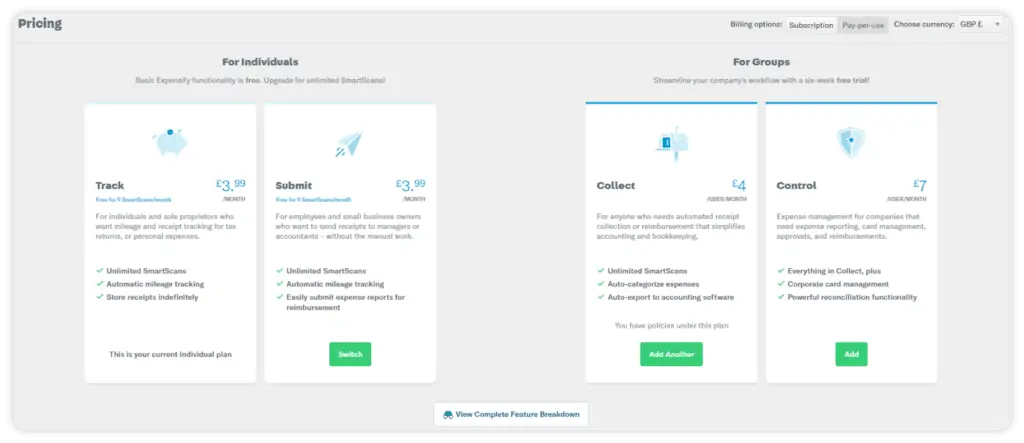
Step 3
Once selected, you will then be able to enter the Settings/Policies tab and then choose your company name under the group Section.
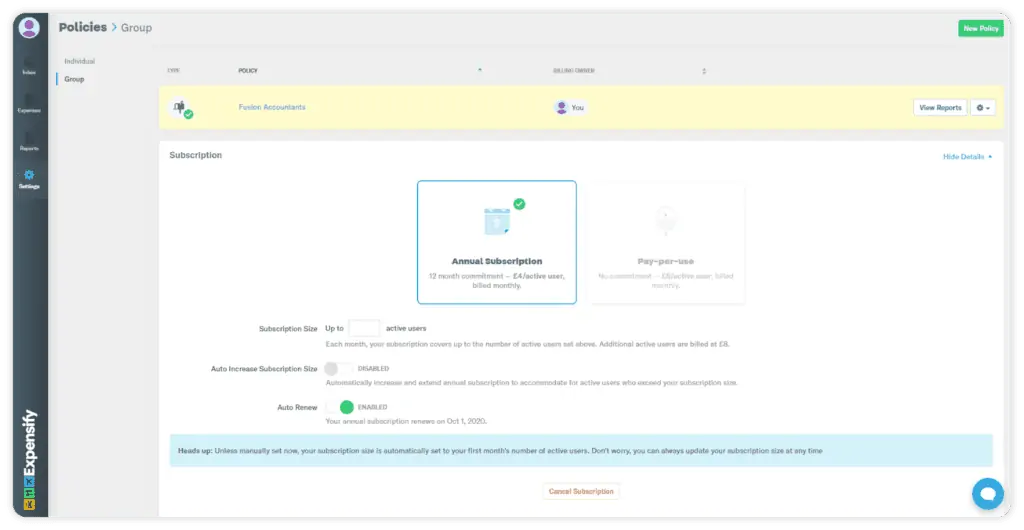

Log into your Expensify account.
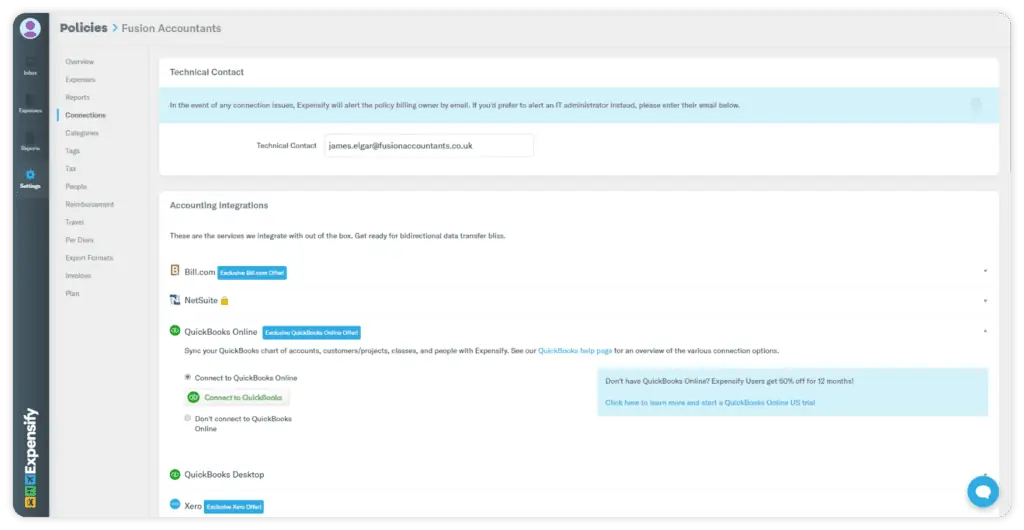
Step 4
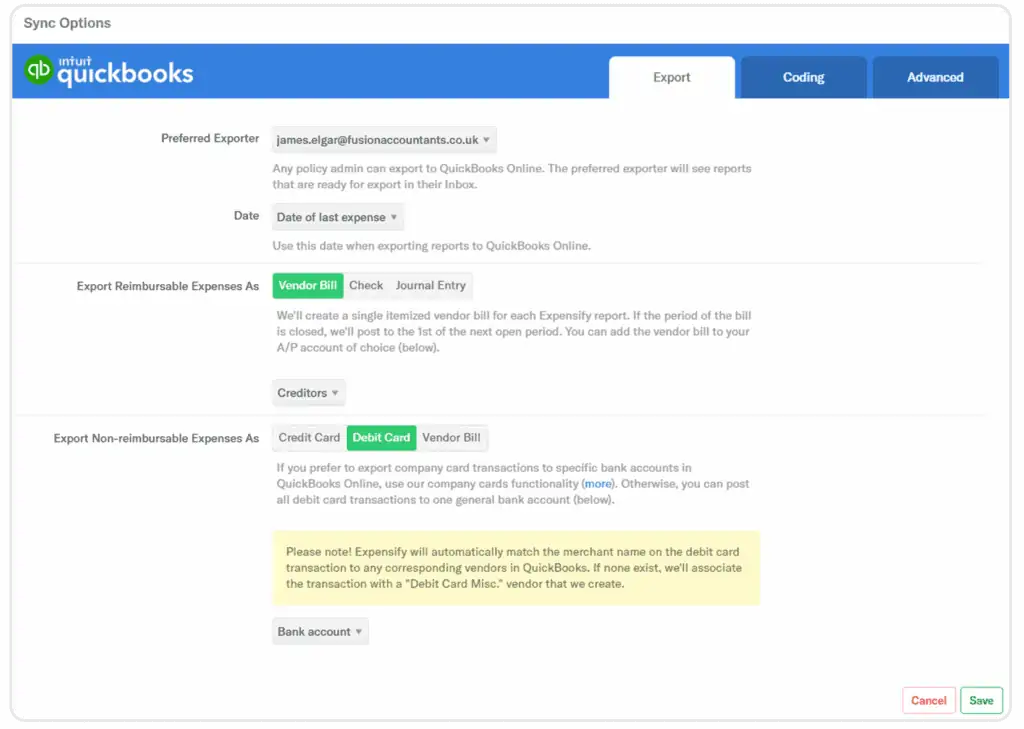
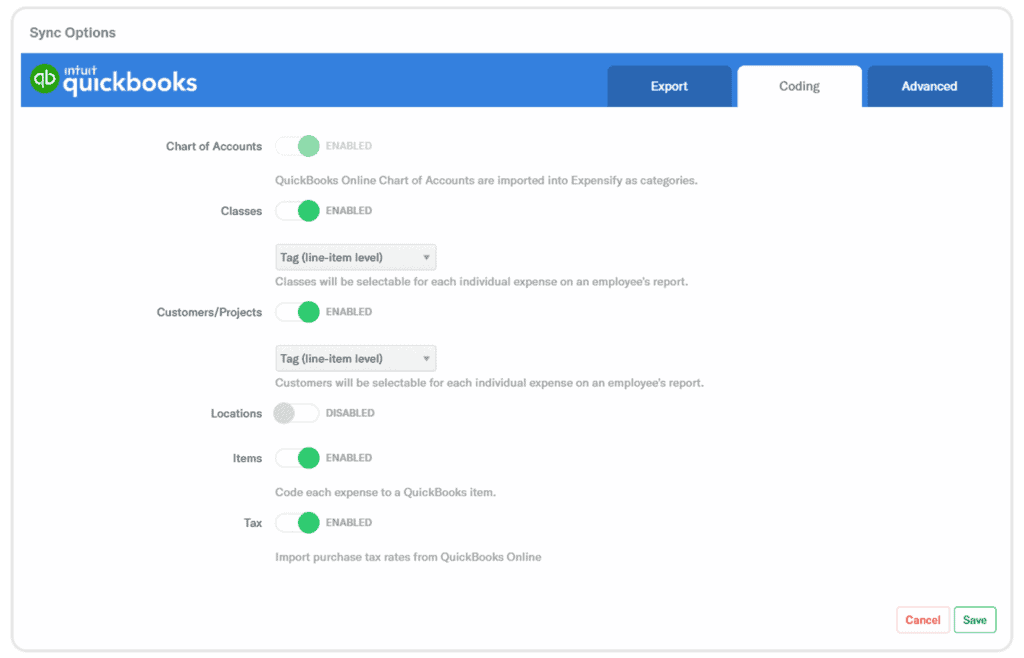
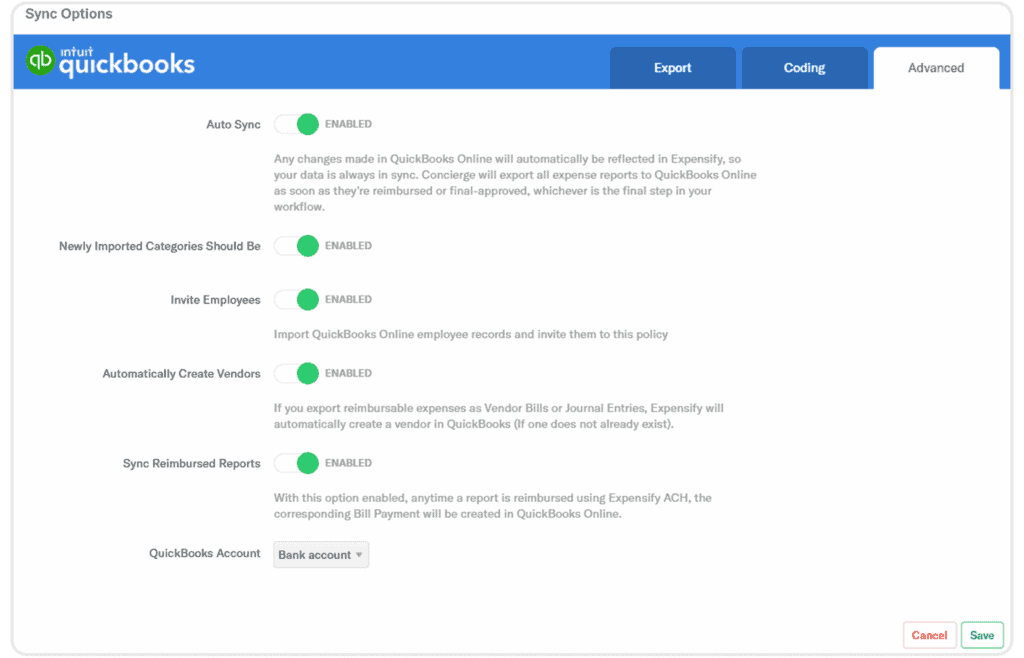
Clicking the ‘Connect to QuickBooks’ link will open the QuickBooks Login Page where you will need to log in. Once logged in, Expensify will ask you to connect to QuickBooks and will then open the sync options when you have confirmed the connection.
Step 5
Clicking save, will finish off the connection process.
Step 6
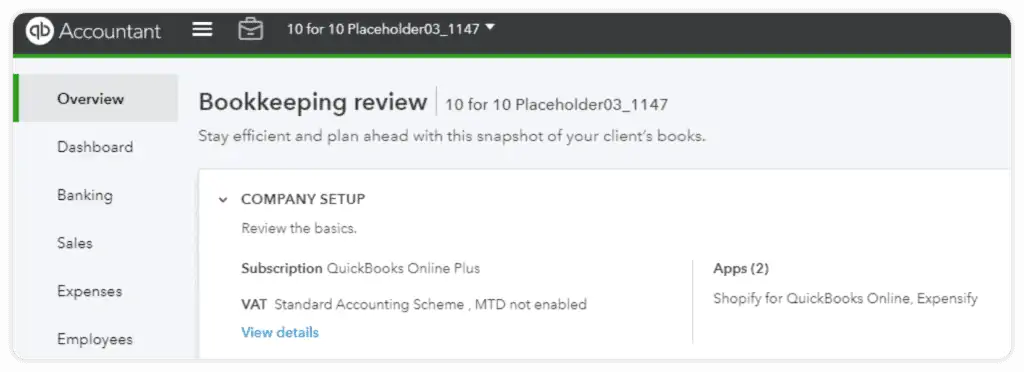
You now need to check if the connection is showing in QuickBooks. Log back into your QuickBooks account and go to the Overview tab. Here you can see the apps connected to QuickBooks.
If you wish to disconnect the app, you will need to go into Expensify and disconnect from the connections tab. Congratulations, you have now integrated Expensify with your QuickBooks account.
How QuickBooks is affected by the integration and the double entries involved
Expensify lists the changes it will make in QuickBooks as the following adjustments. We have chosen the easiest to use. If you are interested in the other options, please feel free the contact your account manager.
1. Export reimbursable expense as – Vendor Bill
This will create a purchase bill in QuickBooks that is awaiting payment. The double entry is.
- DR Expense
- DR VAT
- CR Liability Account
2. Export non-reimbursable expense as – Debit Card
- DR Expense
- DR VAT
- CR Bank Account
When you have the outgoing money transaction to reconcile in Quickbooks, you can match it against the transaction.
We are Fusion Accountants in London, ProAdvisor’s for Quickbooks, making it so much easier for you to keep on top of your accounting records, bookkeeping, payroll and VAT to reduce your admin time and increase the profitability of your business.
Available on mobile and desktop, get your business into great shape with day-to-day financials cashflow management and projections to avoid cash shortages.
We also offer free training and set-up if you are using any of the above accounting software for the very first time or just need a bit of a refresher!

